Martha Nordstrand – Mentor

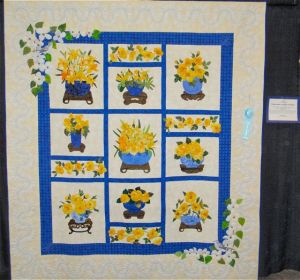
To get the 3 blooms in each bouquet I repeated and turned the smaller flower. Working from the top of the fabric is very helpful. These bouquets were positioned onto the header and then sewn in place using Martha's hidden stitch technique.

Martha Nordstrand is my hero.  When I was in a near panic to finish my 2008 Hoffman Challenge I sought out her advice on how to quilt the background of my entry and she very generously sat down with me at the end of her class and gave me some tips that wiped away my fears of finishing in just one week.  I will always have a soft spot where Martha is concerned.

This is Martha’s website www.morequiltsplease.com showing her work and applique patterns for sale.  I took her borders class here in Phoenix at Quilt Camp in the Desert and thought about how creative borders could be.  I also purchased her Christmas Florals Pattern and made two turned edge bouquets of poinsettias in opposite hand for the top header on a group quilt of gift blocks from my APQS Chat friends back in 2007.  I am nearing the point where I can actually quilt it.  Yea!

You will note the Avery Clear Sheet Labels 8.5″x11″ are used to print out the applique pattern.  The label sections are cut out of your fabric by first placing the clear label piece over the fabric and allowing for a turned edge or a flange depending on whether there is overlap or not.  Then the edges are glued in place.  Once the cluster is done, just move it to where you want to locate the flowers and applique stitch them into place.  Martha’s tips on stitch technique make the thread invisible.  This is by far my favorite technique for turned edge applique since it is so accurate and intricate designs are possible.

2012 IQA Raffle Quilt "Yellow Rose of Texas and More". Drawing November 4 in Houston.

My reservation for Long Beach Quilt Show in July includes a purchase of five tickets for the 2012 IQA Raffle Quilt, “Yellow Rose of Texas and More (81″x91”).  Martha Nordstrand and Stevii Graves designed and executed the appliques and it was quilted by Meredyth Gretzinger Rotlisberger.  I took this photo at Road to California Show and thought how great it would be to have this gorgeous quilt.

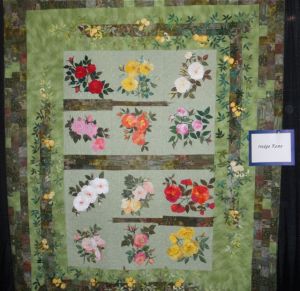
Below is Hedge Rose honored in a collection of Martha’s quilts, Road to California 2010.  You can see her creative borders that make this collection of roses so interesting.  Click on any photo to enlarge for a better view.
Tip #26 – Hanging Sleeve – 2 Seams Method

8" sleeve starts with 2 pieces - 5" and 4".

To achieve the 4″ hanging sleeve that is easier to align and doesn’t show a bulge from the front of the quilt, I make my sleeves in two pieces – 5″ and  4″ strips.  Measure the back of the quilt width where you want the sleeve.  Cut fabric that length.  Usually I use the warp of the fabric (length along the selvage and be sure to cut off the selvage in case there is any distortion).  This direction of fabric doesn’t have any stretch.

Cut a 5″ wide piece and a 4″ wide piece.

If attaching to the top of the quilt and sewing into the binding, then sew the two pieces together along just one length using a 1/4″ seam allowance and press.

Sleeve attached at top of quilt and sewn into binding. Note the 5" piece is on top. Easy to hand stitch the sleeve to the quilt along the sleeve seam.

Double turn and stitch each end about 1/4″ each turn.

Sew binding to quilt and before you finish with hand sewing on the back, this is the time to attach the raw edges of the sleeve to the quilt top edge.

Lay the 4″ piece down on the quilt with the 5″ side facing you.  Meet up the two raw edges with the quilt edge and sew from the side of the quilt that already has the binding stitching.  This way you are retracing your seam and the path will show up on the sleeve.

Smooth out the 4″ side of the sleeve and pin it to the quilt along the seam line.  This will give you an accurate distance from the top of the quilt and your quilt will hang straight.

Hand stitch the sleeve along the pinned seam which is about 3.5″ down from the binding seam.

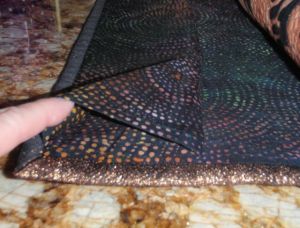
Finish hand sewing the binding just to cover the sewn line that appears on the sleeve.  See the photo to the right of the black batik back and copper metallic binding.  The sleeve won’t show at the top no matter what size hanging rod is used.

The shortest piece is hand stitched along each seam. This one is 12" from the top of the quilt.

The 5″ side is now 4.5″ and the 4″ side is now 3.5″.  This 1″ difference is what goes around the hanging rod so that the front of the quilt appears flush with the front of the rod like a tangent line and there won’t be any distortion.

If you are putting a sleeve in at the 85″ mark for exhibition because your quilt is taller than 85″, use this same technique only close the second seam and finish the ends, turn it right side out, and attach it along a chalk line (General’s white chalk pencil works well) and it will be easy to follow the alignment because you have two seams to follow.  See the green sleeve to the right.

By vickibohnhoff Posted in Tips

Tip #25 – Clean Iron with Mr. Clean

Mr. Clean Magic Eraser cleans iron quickly and without any damage because it is so soft and leaves no residue.

After using my iron for fusing I clean it with Mr. Clean Magic Eraser while slightly warm.  As you can see, the fusible glue comes right off.

By vickibohnhoff Posted in Tips

2 Quilters – Maddie of Girl Scout Patchwork Promises and Ann L. Petersen

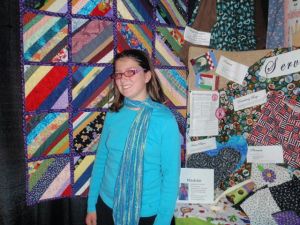
Maddie from San Jacinto who started the Patchwork Promises program.

As a senior Girl Scout from San Jacinto, Maddie created Patchwork Promise’s Sew Awesome program for scouts age 11-17.   The outline covers quilting skill builders, technology, and service projects.

This is the 100th Anniversary of the founding of Girl Scouts by Juliette Gordon Low from the state of Georgia.  There was a fabulous float in the Rose Bowl Parade to celebrate the centennial.

In Sault Ste. Marie, Michigan when I was growing up we had Camp Fire Girls, a similar organization, and it was so much fun.  Mrs. Mackie and Mrs. Harma were our leaders for many years and my mother Mrs. Jacobson taught the sewing portion.  We always referred to our mothers as Mrs.  We didn’t learn any quilting but had fun making aprons.

When my daughter’s Girl Scout troop needed a leader, I stepped up and volunteered.  We learned machine applique of a teddy bear on a sweatshirt and matching pedal pushers for an outfit for the talent show where all ten girls performed to Aretha Franklin’s Pink Cadillac.  While on  our trip to Glenwood Springs, CO they performed the show for the ice cream vendor who gave them all free ice cream, an exciting bonus.  The next year we made green knit dresses with zippers.  Andrea’s mother Donna Mraz who chaperoned on this trip has since become a quilter.

Troop performing for the ice cream vendor in Glenwood Springs, CO and wearing the applique sweatshirts and pedal pushers they made. Olivia is 3rd from right.

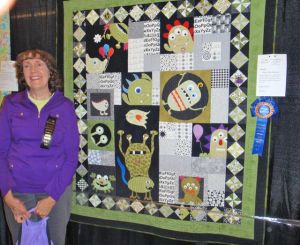
To supplement our cookie earnings we stuffed quilting patterns for the Great American Quilt Factory founded by Nancy Smith and Lynda Milligan in Denver, Colorado.  It was sad to see their store close the end of 2010 since now I was a quilter and they had been a part of our Girl Scout Troop’s success.   While visiting Nancy in 2010 I met Ann Petersen who designed patterns, worked up fabric line samples, and taught classes.  Ann is an AQG member, who winters in Arizona.  We were practically neighbors in Aurora, Colorado.  At the AQG Awards Ceremony this month she won a Blue Ribbon for this darling monster quilt she made for her grandchild.  It is interesting how lives intertwine.

Ann L. Petersen wins a blue ribbon for "Peek-A-Boo Monsters" at AQG 2012 Quilt Show.

Tip #24 – Homasote is Popular, Need for Posting Inspiration

In the Cloth Paper Scissors “Studios” publication from Fall 2011 on page 82 the article on Genevieve Gorder mentions that she has a Homasote Design Wall too.  Only she painted 12 coats of black, chalkboard paint onto the boards.  She says “This is where I tack up ideas and capture the moments I don’t want to forget”.  I use my board for tacking up inspiration too – little cat photo to make into a quilt, a test sample of bleaching on batik fabric, a Paint Stix design made on a cruise, rules for the Route 66 entry, a blue ribbon from the latest AQG show, a thank you note from a friend, a bowl that Joy Lovell made with little beads in the middle, a 4″x6″ pencil sketch for my recent quilt “Arizona Valentine”, and a silk Christmas pillow with fancy stitched colorful balls.  It’s good to have inspiration.

Gina Perkes gave a lecture at MQX in Overland Park, KS and talked about saving bits of inspiration in a fancy box.  She is obviously neater than I am by using a box instead of decorating her design wall.

Some of my friends have put up Homasote design walls too – Joy, Linda, Jackie, Elaine.  So it’s just not famous quilters or HGTV designers, it’s those of us who like to see what we are doing and be able to step away from the wall and get a good view of the overall layout and design to assess whether it is working well.

Tip #23 – Airplane Travel Hook

Handy spring-clip hook for headphones or hand quilting bag.

Judy next to me on the airplane was a frequent flyer and went from task to task with efficiency – reports, movie, puzzle.  All these with her Bose headphones from a case hooked onto the pocket of the seat in front of her.  What a great way to remember them when getting off the plane.  I have a hook like this at home, one with the spring clip, only I used mine for starting the loop on a braided tote handle.  Next time I’ll have to travel with this magic hook because I could see one for a hand quilting project bag.  And  one for my headphones too.

Actually my hand quilting project bag for the airplane has been a hole punctured through a Zip Lock bag just beneath the strong zip part and hooked onto the coat hook which is also the clasp for the tray table.  It does swing a bit with the motion of the plane but I can easily find everything through the plastic.  That reminds me of the rocky flight from Thailand to LAX with a motion sick Asian man using my shoulder for a head rest.  Poor man, the last row can be bumpy and maybe my swinging project bag of hexagons wasn’t a help.  Keeping busy with handwork was soothing to me.

Yes Wendy scissors are still not allowed so use a threader/cutter tool where the blade is embedded in the device.  On another trip I threaded 16 needles and wound them onto a small rectangle of styrofoam and used the blue painters tape to secure the threads.  Then was able to do applique all the way there and could stick the pins into the styrofoam.

Hook will handle up to 150 pounds and is not suitable for mountain climbing. Whew! Don't have to do that.

Design – Embassy Suites Hotel Carpeting

Even the room number plaque has the flower design. Guess I'll remember my room number now.

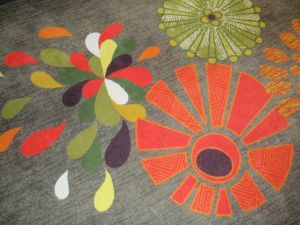
Hallway carpeting on each floor is cheerful and colorful.

Embassy Suites Hotel is part of the Hilton chain.  In 2011 I stayed here while attending the Houston International Quilt Festival.  It is practically across the street from the show which allowed me to take purchases back to my room and lay down on the bed for just a little bit, quite refreshing, then empty my bag and start all over again.  The carpeting design in this hotel isn’t as fancy as the one in the Hilton across the street but perhaps in-house designers were used.  Certainly this was not Paula Nadelstern’s inspiration.  Though not as complex it is still quite pretty and the flower motifs are used on upholstery, wallpaper, and even the room number plaque.  How this applies to quilting is that you can take inspiration, change it up and make it your own.  Work in small sketches, bits of paper, bits of cloth, pencils, scissors, until you find something pleasing that you want to make into a quilt.  After the show my friend Jeannie Rogers said that she would love to go with me next time so we made reservations on the spot.

Wallpaper down hallway coordinates with carpeting.

A mixture of flower shapes is very interesting. This design is less complex than the Hilton carpeting but then the rooms are less expensive too.

Inspiration – Nadelstern vs. Hilton

Skywalk from Hilton to Convention Center

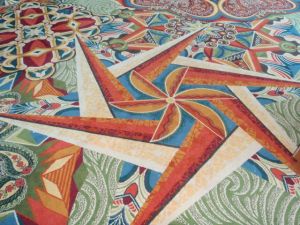
It’s been a few years since I read about this story of design infringement.  Most of us know the famous Paula Nadelstern and her fabulous kaleidoscope quilts.  Lots of people, non-quilters, go to quilt shows and take photographs of quilts they like.  One of these  folks took a photo of Paula’s quilt and long story short, the design ended up in the Hilton Hotel next door to the Houston Convention Center where Houston International Quilt Festival is held.  Quilters saw the carpeting, photographed it and showed the pictures to Paula.  They said “isn’t this your quilt”?  Yes it was and Paula brought suit against the parties that had stolen her design.  The settlement was for an undisclosed amount of money.  It would have been better to ask up front, a lesson to all of us who derive inspiration for our quilts, our art, or in this case, our custom woven carpets.  When you are next attending the quilt show in Houston be sure to walk the skywalk over to the Hilton and see the fabulous carpeting which continues into the hallways and ballroom.  Absolutely spectacular!  It’s exciting to see the quilt designs spread everywhere.

Design – Valentine Fancy Stitches Exercise

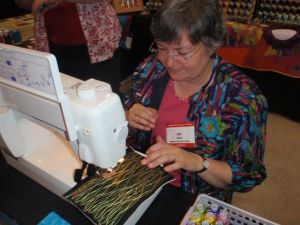
In the WonderFil thread booth Lucy demonstrates couching with InvisiFil 100wt Soft Cottonized Polyester.

Lucy was in the WonderFil booth at Houston Quilt Festival showing how the InvisiFil fine polyester thread in colors can be used to couch over fancy thick threads and yarns without even showing.  Funny thing is that I had already purchased a package of the InvisiFil spools the previous year and hadn’t used them.  It’s a great suggestion for adding texture to a quilt.

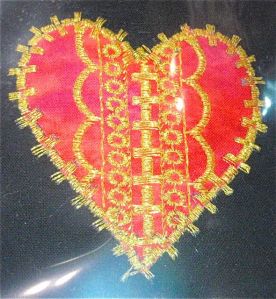
She also teaches classes on using your machine’s fancy stitches.  Her book of heart samples were fascinating.  There is a bit of shine on these pictures from the cellophane protection.  She suggests that I cut 5″x7″ pieces of black fabric to provide the black background for the hearts and then these blocks can be made into a quilt later.  A fused-back heart, possibly one cut on the AccuQuilt Go machine is fused to the black 5″x7″ rectangle cloth, backed with stabilizer to keep stitches even, then stitched in a variety of embroidery threads and metallics to create one-of-a-kind hearts.  She said that this class is very popular and it’s a good way to build up knowledge of your machine’s stitching possibilities by working through the curves, outside and inside points of a heart.  After these exercises she claims that a person would have great control of their machine.  I need to try this.

Red heart with metallic gold thread on 5"x7" cloth.

Heart with fancy machine stitches on 5"x7" black fabric.

Design – Try Color Variations in Embroidery

Sunflower stock embroidery motif on Viking machine used in color variations.

When doing stock embroidery on your machine, try some color variations.  I made these for my friend Patty Needham who wanted something special for the corner blocks on her quilt.  I selected four different background fabrics and changed the position of the colors of the same sunflower motif and they really came out nice and even played well together.

By vickibohnhoff Posted in Design